Other Side of the River


Water Feature
I have been talking about making a water feature since we moved into our farmhouse two years ago. In my head, I envisioned something grand, something we could dunk ourselves into, a cold plunge with mossy rocks and flowing waterfalls, maybe even a few koi fish. But then I had to snap out of it and remember my own advice--start small.
This last weekend, we were blessed with amazing weather! When you live in Wisconsin, winter can drag on and on. This winter was especially depressing with little snow and sunshine and a whole lot of rain and clouds. So when the beautiful weather finally appeared, it was easy for me to stay out of the kitchen and get myself outside to finally build a water feature.
I chose my spot for this small water feature, right off the gutter in the back of the house. Our basement gets a bit flooded when it rains, especially in this particular area of our house. I am hoping, by choosing this location, it will help with the basement.

We had some leftover plastic from when we renovated our balcony, so I used that piece to determine the size of the water feature. It measures roughly 2 feet by 5 feet. I looked at a few pictures on Pinterest but did not read about how to do it. I talked to Graham about it; and he gave me some suggestions, but he was not really sure about the exact way to do it either. I listened to my creative voice and just followed its lead.
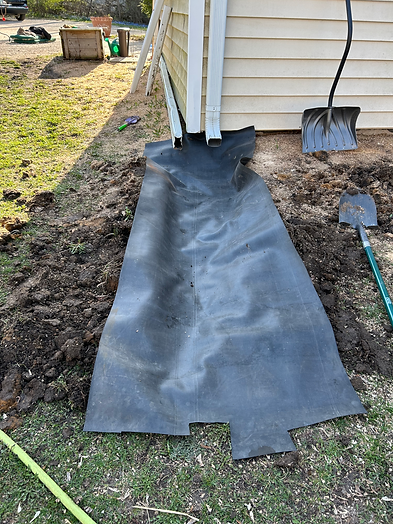
I started digging nearest the house first and continued for a bit until I needed to start narrowing the tunnel. I carved out the shape with a shovel, lifting the plastic up from time to time to ensure I was staying within the confines. Once I had my shape outlines, I started digging again. I only dug a few inches into the ground, making sure the little tunnel would allow water to drain away from the house.

We had friends stop over the next day to visit our baby chicks. While our kids played, my friends helped me dig up big rocks from the yard to use as the border. We spent the morning digging and carrying big rocks over to the site.

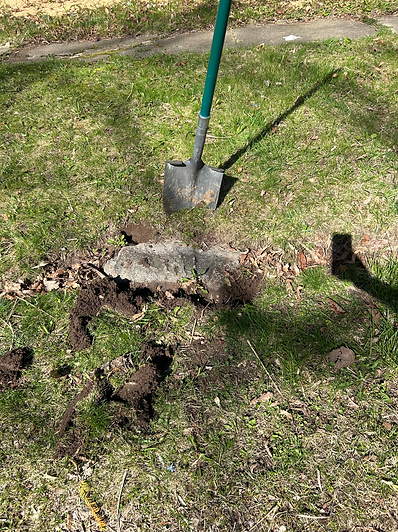
When they left, I sorted the rocks the way I liked along the side of the plastic. I made sure the rocks hung over the plastic so I couldn’t see any of the plastic. This took me awhile as I rearranged the giant rocks to get them just where I wanted. I suspect I will lose a thumbnail after I smashed it between the two rocks, but it was worth it!
I was planning on trimming the plastic that sticks out around the border, but I did not do that in time. I thought it needed to be done before I placed the giant rocks as the border. I spent so much time rearranging, that I could not bring myself to move the rocks again in order to cut the plastic. I decided I would just cover the plastic with dirt and worry about cutting the plastic later when I have more energy. It turns out that the soil stays in place just fine so there is no need to cut the plastic at all! I am thankful I made that mistake because it saved me time, and I do not have to worry about weeds growing so close to the giant rocks.
Update: The soil eroded very quickly so I ended up cutting the plastic. The grass is growing back and it will be easier to maintain with the plastic trimmed right up to the rocks.

I was highly motivated to finish the water feature before Monday, so I made a quick stop to pick up some rocks to lay inside the plastic. My daughter accompanied me and helped me lift the 5 bags of river pebbles and 3 bags of river rocks into the back on my Equinox.
When I got home, we dumped the river rocks first, spreading them out as far as they would go. I dumped the river pebbles next, getting them as close to the border as possible, ensuring I covered up the plastic. I suspect the rocks will fall from the sides during a big rain, but I am ok with providing a little maintenance from time to time.
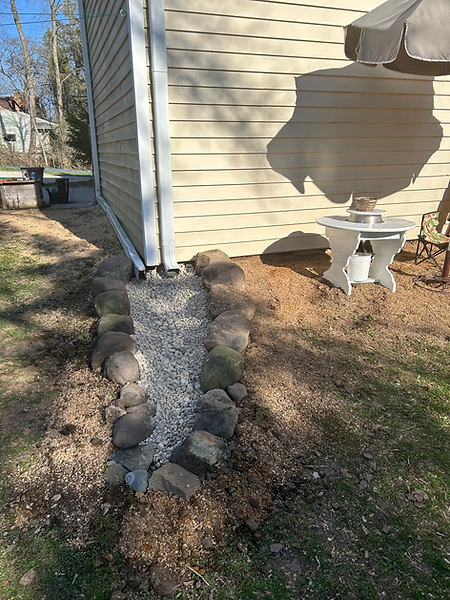
Now I wait for a big rainfall. Seeing this water feature in action will determine if it does help keep our basement dry. It will also help me see any mistakes for when I do get to my next water feature—something epic, something we can dunk ourselves into, a cold plunge with mossy rocks and flowing waterfalls, and maybe a few koi fish.